AutoInstall SSL (cPanel) Auto Update Guide

To use the Auto Update function with our AutoInstall SSL™ plugin, first you need to setup a cron job using the Command prompt (we recommended running the cronjob weekly).
How do I Add/Edit the Crontab?
- Login to server using Putty
To add or update the cronjob in the crontab, use the below command. It will open the crontab file in editor where the cronjob can be added/updated. :
crontab –e
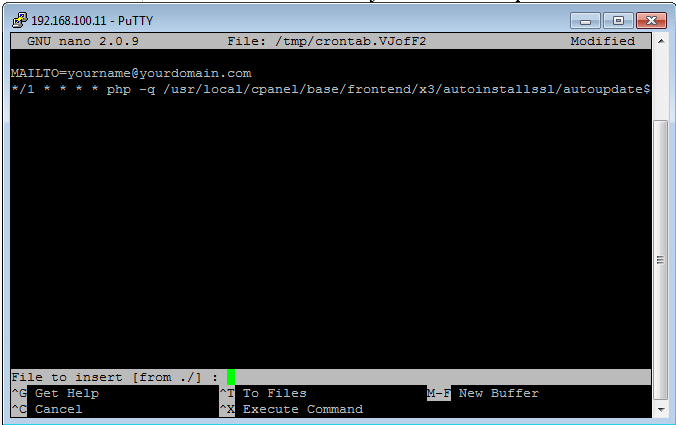
MAILTO=youremail@yourdomain.com
* * * * * php -q /usr/local/cpanel/base/frontend/$theme/
                                              autoinstallssl/autoupdate.php
MAILTO: the cron job email will be sent to this email address. Replace with your email. \$theme: Please replace \$theme with the theme name that you are using. It can be x3 or paper_lantern.
*****: Please replace asterisk with Minute (0-59) / Hour (0-23) / Day of Month (1-31) / Month of Year (1-12) / Day of Week (0-7) 0,7 are Sunday.

Success and error messages (you will receive messages on the specified email address as listed below):
- Successful update: "Plugin version successfully updated from 3.0 to 3.1 for CentOS 6.6, PHP 5.4 and WHM 11.48."
- If there is no record found: "No record found! For the current Plugin Version 3.1, CentOS 6.6, PHP 5.4 and WHM 11.48."
- If there is major version: "This is the major version of the plugin, you need to update manually! For the current Plugin Version 3.1, CentOS 6.6, PHP 5.4 and WHM 11.48."
- IonCube Loader error on WHM: "Site error: the file
/usr/local/cpanel/base/frontend/x3/autoinstallssl/autoupdate.phprequires the ionCube PHP Loader ioncube_loader_lin_5.4.so to be installed by the website operator. If you are the website operator please use the ionCube Loader Wizard to assist with installation.\"